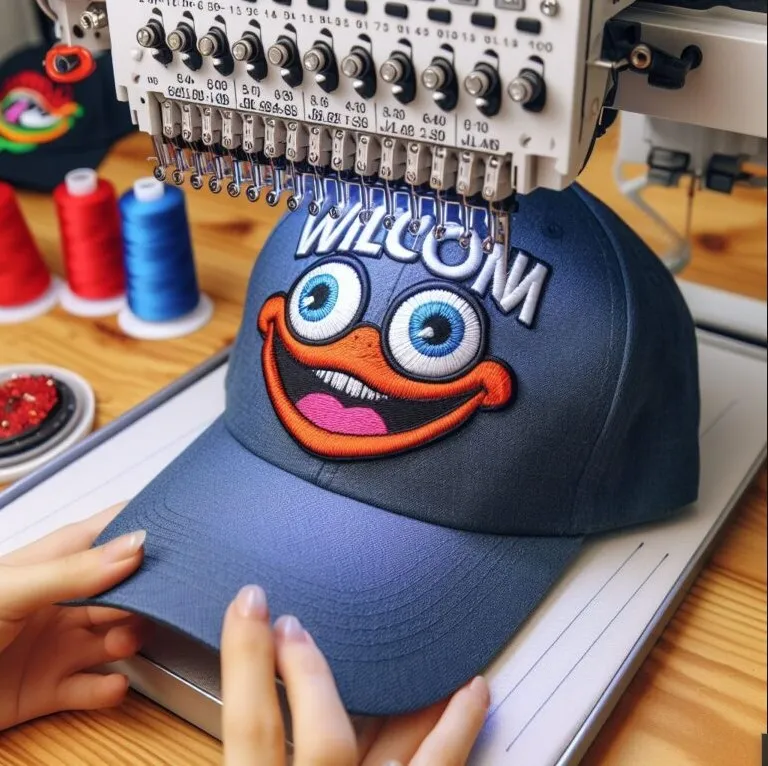
Digitizing for hats is a whole different ball game. If you’ve tried taking a flat embroidery design and stitching it onto a cap, you’ve probably faced issues like distortion, thread breaks, or misaligned stitching. That’s because hat embroidery requires specialized digitizing techniques to accommodate its curved surface and structure.
In this complete guide, we’ll break down pro-level tips for digitizing hat embroidery designs that stitch clean, stay centered, and look flawless every time — whether you’re working with structured caps, unstructured dad hats, or trucker caps.
Want expert-quality results without trial and error? Let Digitizing Buddy handle the hard part. Their team provides professional hat embroidery digitizing services, customized for any cap style and machine type — with quick turnaround and precision stitching.
Now, let’s stitch smarter, not harder!
Why Hat Embroidery Requires Special Digitizing
Hats aren’t like flat t-shirts or tote bags. They’re curved, thick, and often reinforced with backing or seams — especially structured caps. That means designs digitized for flat fabric often won’t translate well.
Key challenges with hats:
- Curved surface = distorted designs if not adjusted properly
- Limited embroidery area (especially vertically)
- Center seam interference (on 6-panel caps)
- Stitching order matters more than ever
- Stabilization is crucial
A well-digitized hat design compensates for all these factors from the very first stitch.
Tip #1: Start from the Center, Work Outward
One of the golden rules of hat embroidery digitizing:
Start in the center of the design and stitch outward.
Why?
- It helps maintain alignment on the curved front panel
- Reduces puckering and distortion
- Prevents shifting, especially on structured caps with stiff fronts
Pro trick: Digitize your design to begin dead center — either vertically or on the center seam — and gradually move out toward the edges.
Tip #2: Keep It Tall and Simple
Most embroidery machines can only stitch within a 2.25″ height area on hats — due to the frame and the curve of the bill. That means horizontal logos work best.
Ideal hat design size:
- Width: up to 4–5 inches
- Height: 2–2.25 inches max
Avoid tiny text, ultra-thin lines, or intricate details that won’t show well when scaled down.
Tip #3: Use Satin Stitches for Clean Edges
When digitizing for hats, satin stitches are your best friend:
- They cover uneven surfaces well
- Add dimension and shine to lettering or logos
- Hold up well on structured caps
Use satin stitches for:
- Text (minimum 0.25″ height for clean results)
- Borders
- Simple shapes
Avoid dense fill stitching unless absolutely necessary, as it increases stiffness and can warp the design on a curved surface.
Tip #4: Shorten Stitch Length on Curves
Hats curve — your stitches should too.
If your design includes curved text or elements (like circular logos), reduce the stitch length slightly to maintain smoothness and prevent thread bunching.
Rule of thumb:
- Standard stitch length: 2.5 mm
- Curved elements: 2.0 mm or less
This small adjustment can drastically improve stitch consistency around curves.
Tip #5: Add Proper Underlay Stitching
Without proper underlay, your stitches can sink into the thick fabric of hats or bunch up near seams.
Here’s a simple underlay plan:
- Edge run underlay for satin borders
- Zigzag underlay for curved satin text
- Tatami underlay if using fill stitches
Underlay also stabilizes the design and reduces pull compensation issues.
Tip #6: Compensate for the Cap Curve
The hat’s curved front can distort wide shapes and lettering. To fight this, use pull compensation during digitizing.
What is Pull Compensation?
It’s when you widen your stitch paths slightly to account for fabric pulling during stitching.
For hats, increase pull compensation by 0.2–0.5 mm, especially for:
- Satin borders
- Horizontal lettering
- Shapes that span across seams
Tip #7: Avoid the Center Seam (When Possible)
Many hats have a bulky seam dead center on the front panel. If you can, avoid placing fine details or lettering directly over it.
Why?
- Seams deflect the needle
- Distortion or skipped stitches may occur
- Logos lose symmetry if seam splits key elements
Work around this by centering solid shapes or bold icons on the seam, and placing small text or details just off-center.
Tip #8: Use a Cap Frame and Proper Stabilizer
Even the best digitizing won’t save your hat embroidery if your hooping isn’t right.
Use:
- A cap frame or specialty hoop for your embroidery machine
- Tear-away stabilizer (medium to heavy weight)
- Hat backing if the cap is too soft
For structured caps, add a crown support insert to keep the stitching surface smooth and firm.
Tip #9: Keep Lettering Above 6mm
Tiny text and hats don’t mix well.
Minimum safe size for readable hat text:
- 6 mm height for satin stitch text
- Use block or bold fonts for clarity
- Avoid script or serif fonts unless text is larger
You can also convert very small text into run stitches — just keep the letters spaced and simple.
Tip #10: Test and Adjust
Even professionals test every hat design before production.
Here’s your test checklist:
- Stitch on a sample hat or similar scrap fabric
- Check for pull distortion
- Confirm text legibility
- Adjust stitch angle or density if needed
Pro tip: Digitize at actual size. Never resize embroidery designs after digitizing — it distorts stitch spacing and density.
FAQs: Hat Embroidery Digitizing
What embroidery file format should I use for hats?
The format depends on your machine:
- Brother/Babylock — PES
- Janome — JEF
- Tajima — DST
- Melco — EXP
- Bernina — EXP
Services like Digitizing Buddy provide your file in any format you request.
Can I use a flat embroidery design on a hat?
Not really. Designs for t-shirts or bags don’t account for the curve or structure of a cap. You should digitize specifically for hats.
What’s the best type of hat for embroidery?
- Structured caps (like Flexfit or Richardson 112) hold designs best
- Unstructured/dad hats require light density and careful hooping
- Avoid overly stretchy hats unless using specialized materials or stabilizers
Final Thoughts: Digitize Like a Hat Pro
Embroidery on hats isn’t just about the stitches — it’s about strategy. From hooping to stitch type, every detail matters when working on curved, structured surfaces.
To recap, expert-level digitizing for hats means:
- Starting from the center
- Keeping designs simple and bold
- Using satin stitches and proper underlay
- Adjusting for curve and seam distortion
- Always testing before final runs
Want professional-quality hat digitizing without the learning curve? Trust Digitizing Buddy to prepare flawless files tailored for any hat type, fabric, or machine format. Their experienced team ensures your design stitches clean — no matter the curve.


Leave a Reply